In the WordPress Editor, you will use blocks to create content. There are many blocks for you to choose from, which you’ll see organized by category. You can edit or move each block independently of other blocks, and individual blocks sometimes come with their own formatting settings for even greater control over layout and function.
Elements of the WordPress Editor
The WordPress Editor is made up of three main areas; the top menu, sidebar menus and the main content area.
Top Menu Options
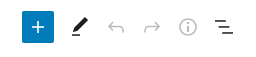
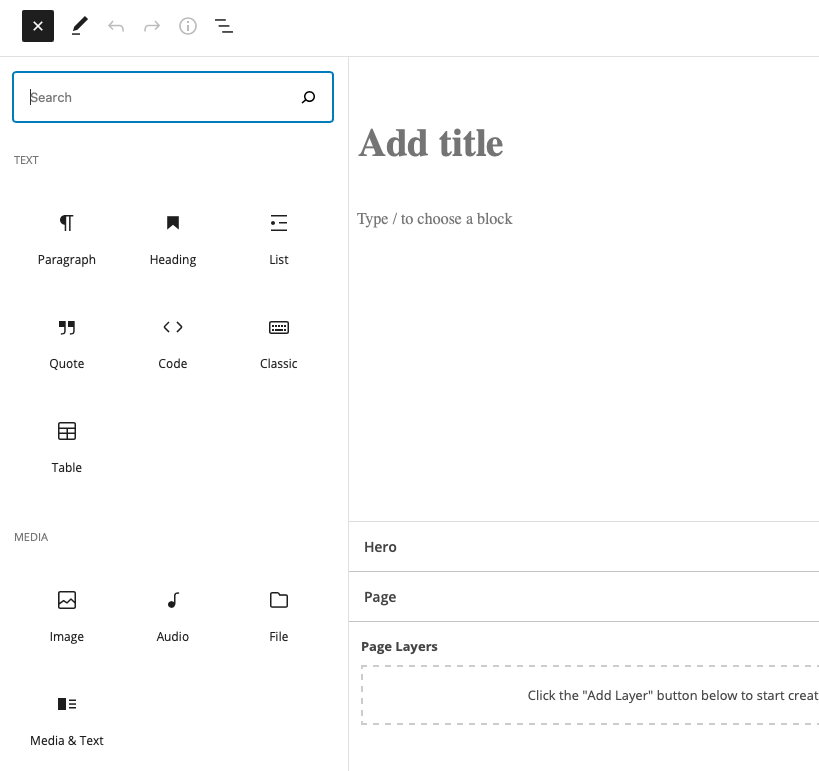
- Block Inserter: Browse all of the available blocks, block patterns, and reusable blocks to add them to your page or post.
- Tools: Choose between editing a block and selecting a block. Choose the Select tool to select individual blocks. Once a block is selected, press the Enter key on your keyboard to return to editing.
- Undo and Redo: Undo an action, or redo an undone action.
- Details: View the number of characters, words, headings, paragraphs, and blocks used on the page.
- List View: See a list of all of the blocks that are on the page. Useful for navigating to different blocks.
- Save draft: Save a draft of your page or post
Before you’ve published your page or news, you will see these options:
- Preview: See what your page/post looks like with the theme applied.
- Publish: Publish your page/post.
After you’ve published your page or post, you will see these options:
- Switch to draft: Unpublish a page or post and switch it to a draft.
- Preview: See what your page/post looks like with the theme applied.
- Update: Update your published page/post with the newly added content.
- Settings: Display or hide the Page and Block Settings sidebar menu.
- Options: Opens View options, Editor style, and additional tools.
Sidebar Menu
The Settings sidebar menu includes the Page/Post settings:
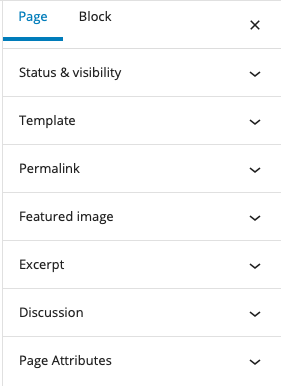
When you click on a specific block, the Settings sidebar menu includes additional Block settings specific to that block.
Content Area
This part of the WordPress Editor is where you will spend most of your time. In the WordPress Editor, you will use blocks to create content. There is a block for every type of element you could ever wish to add: text, images, video, audio, columns, spaces, page breaks, payment buttons, calendars, and much, much more!
This is the main section of the editor, where you add blocks of content.
Working With Blocks
Add a block
There are multiple ways to add a block and choose the block type you need:
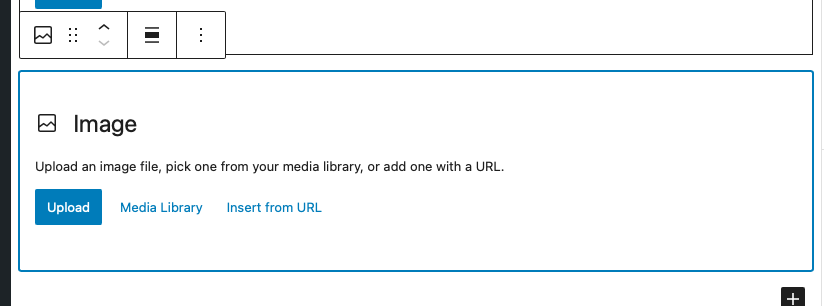
- Click the black + icon at the side of an empty block.

- 2. Click the + icon at the top left of the editor. This option is great for previewing different block styles. You can hover over the blocks for a brief description.
- 3. Hit the Enter/Return key from a selected block to create a new block below it
- 4. Click on the three dots just above a selected block and choose to insert a block above or below the current block.
- Once you become familiar with the names of different blocks, you can quickly add a block by typing a forward slash followed by the block name — for example, /image or /heading.
Move Blocks
You can move blocks around by clicking and dragging the six dots icon in the block’s toolbar that appears when you click inside a block. You can also use the up and down arrows to shift a block one spot up or down:
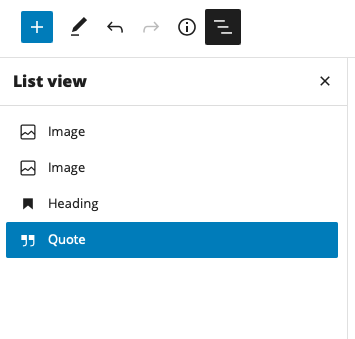
Alternatively, you can use List View to see a complete list of blocks on your page, and click and drag blocks into new positions:
Customize Blocks
Each block has its own settings. To find them, click on a block and this will reveal a toolbar at the top of the block. You’ll also find additional settings in the sidebar to the right of the editor.
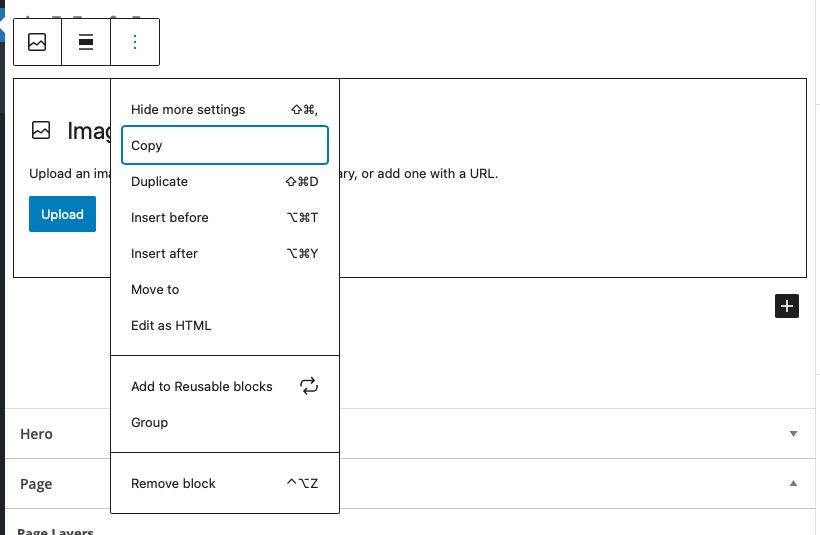
Block Settings – Toolbar
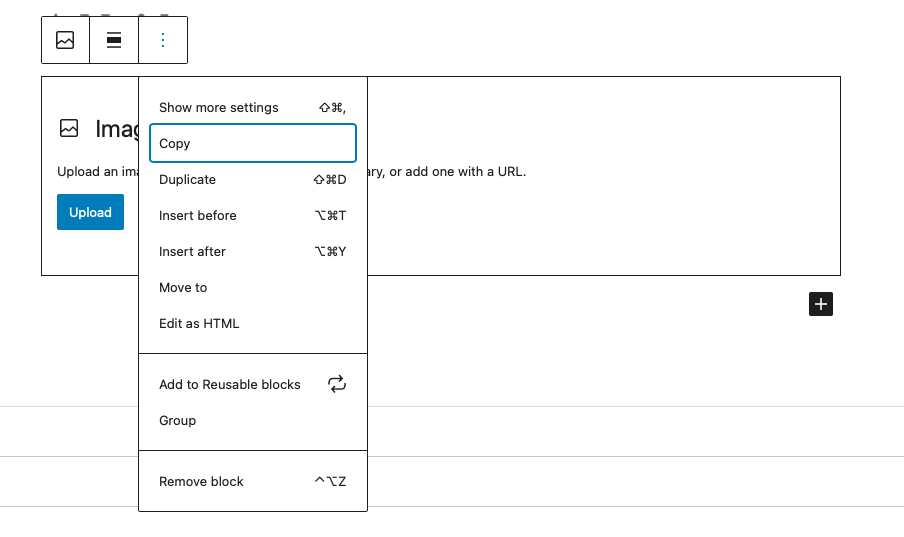
Click on the three dots to the right of the block toolbar for additional options that are present in most blocks.
- Show More Settings opens the sidebar menu.
- Duplicate creates a second block on the same page with the same content.
- Insert Before/After adds a new block before or after the current block.
- Edit as HTML switches the block to the HTML version of it so you can edit the HTML directly. When editing as HTML, this option changes to Edit Visually.
- Add to Reusable Blocks allows you to create a block that can be used on other pages that retains the content and styling of the block. How to use Reusable blocks .
- Group places the block inside of a Group block.
- Remove Block deletes the block from your page/post.
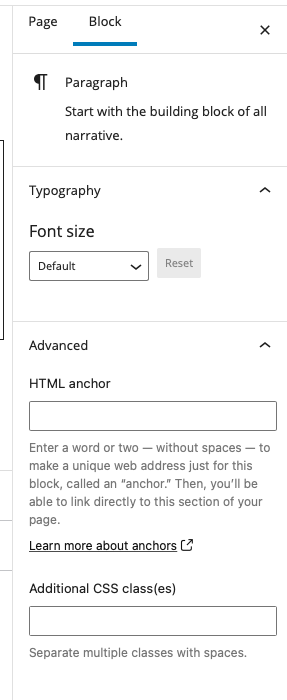
Block Settings – Sidebar
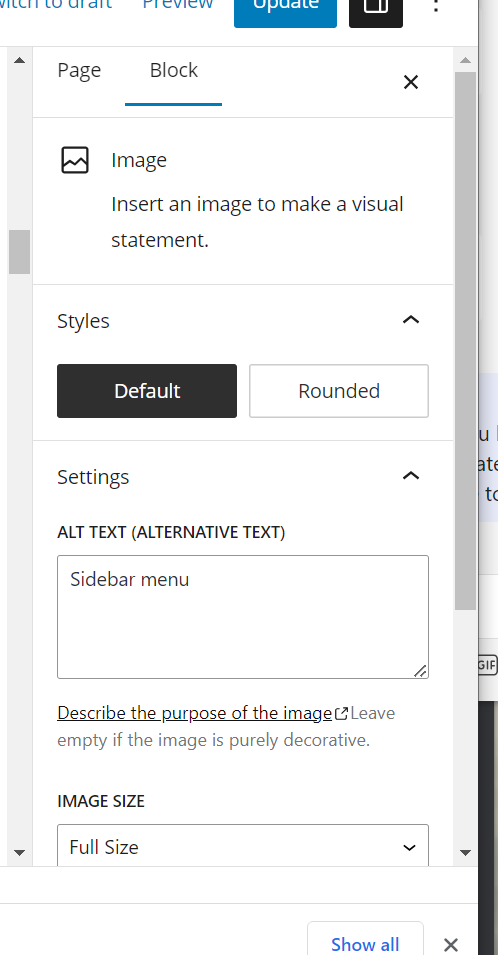
The Block settings on the right of your screen will provide different options based on what block you’re using.
In the screenshot, the selected block is a Paragraph, so the options include changing the font size and advanced options for creating page jumps or adding a CSS Class.
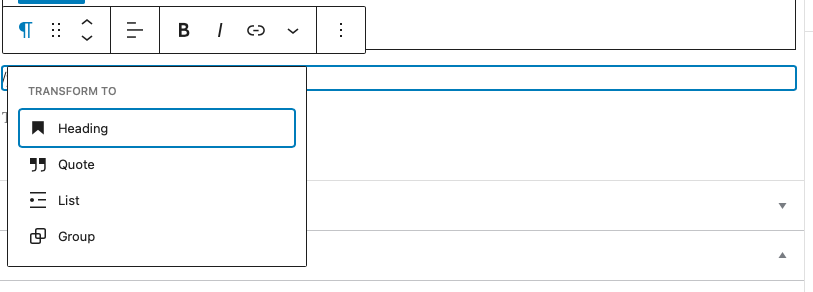
Change Block Type
You can transform each block to another similar or related block type. For example, change a paragraph to another block by clicking on the paragraph icon in the block’s menu bar and then selecting the type of block you’d like to transform to.
Block Navigation
As you create detailed layouts, it’s important to learn how to navigate through all the blocks on the page, so that you can make changes easily.
To access List View, click the icon that looks like three horizontal lines above each other at the top left of your screen.
This will show you a list of all the blocks you have inserted into that page or post. It makes it easy to see the structure of your page and select an existing block you wish to work on. You may also click and drag blocks here to move them to a new position.

Remove a Block
To remove a block, select the block and click the three dots in the toolbar right above it. Among the settings there, you will see the option to remove that block.
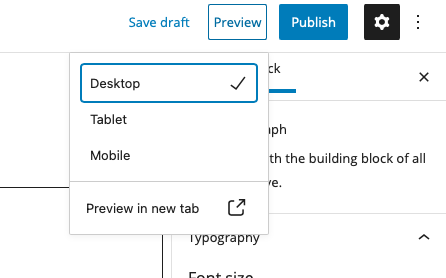
Preview the Page or Post
Even though the block editor gives you a visual representation of what the page will look like when it is published, there can be small changes to the look once the theme or theme customization is applied.
The Preview option loads the page you’re working on, along with the theme and saved theme customizations (like custom CSS).
Preview also provides the option to see how your page or post will look on a desktop, tablet, or mobile device.